How to
create a new
company
in Acomba
People who are bitten by the entrepreneurial bug often launch more than one company. Fortunately, Acomba allows you to manage several companies with a single license. All you have to do is create a new company and start the various modules. Here’ how.
Start by creating a new company by clicking the File menu and selecting New Company.
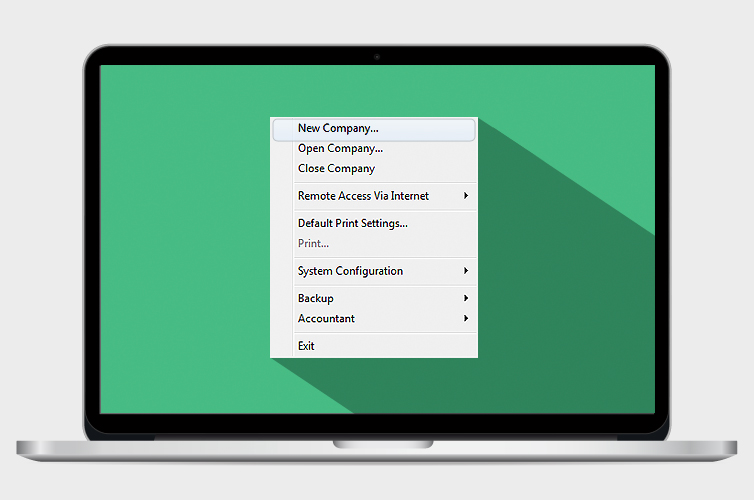
A company is a database contained in a folder. By default, companies are classified in the F1000.DTA directory.
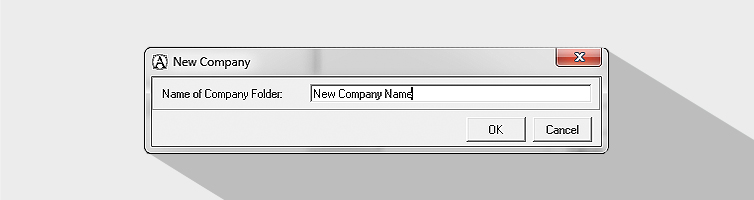
In the New Company window, enter the name of the new company folder. It is just a name for the directory: you don’t have to enter the company’s real name and you can subsequently modify it in Windows explorer. Once you have named the folder, click OK.
In the Creating Files window, select the modules to be started. In all cases, selecting the Company box is mandatory, since it contains the chart of accounts.
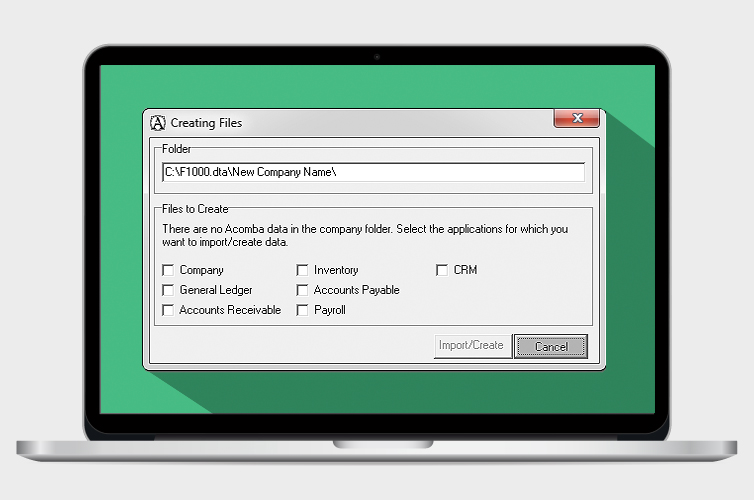
To go faster, select the strict minimum, since the startup process only ends once all selected modules are started. You can start the other modules later on.
After you click the Create button, the Select Applications to Startup window is displayed.
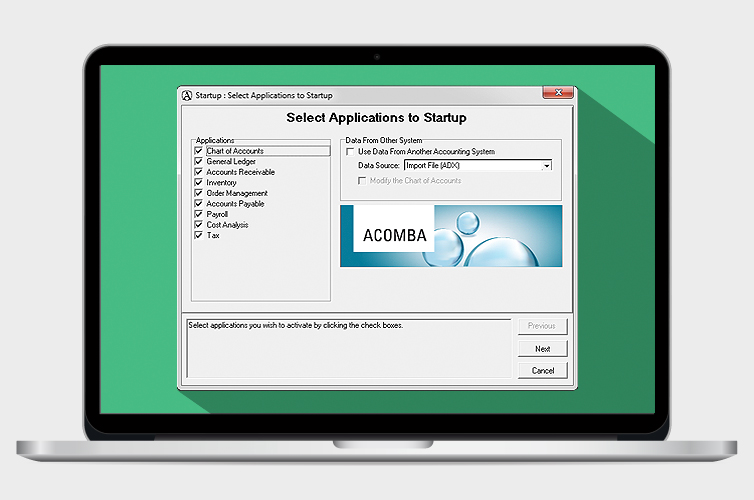
Select the applications to start and, if you have already used another accounting system for your company, import the data through the Data from Other System section.
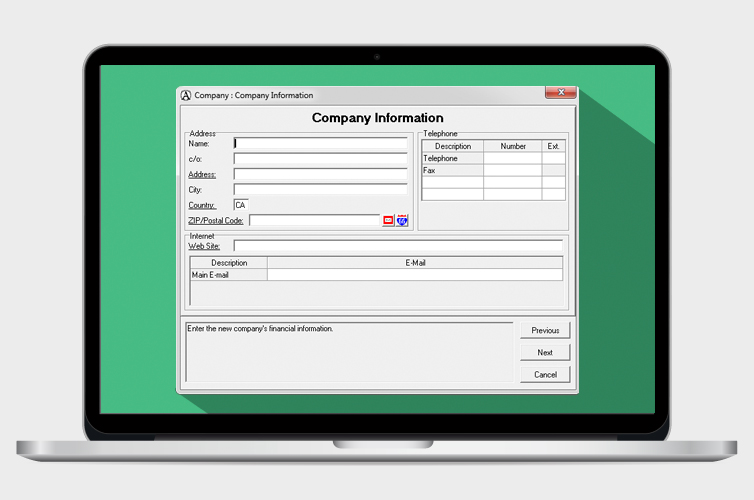
After clicking Next, you must enter general information about your company in the Company Information window and click Next again. You can modify this information later if needed.
In the Company: Select Chart of Accounts window, several options are offered. Start by selecting your company’s line of business in the left column. You can then select a chart of accounts in the list, or Create or Import one.
You can also use the File button to import the chart of accounts from a CSV file. In fact, you can create your chart of accounts with Excel.
If you want to create your chart of accounts with Excel and you don’t know how, refer to the procedure below. If not, skip this section and continue reading the article!
Creating a chart of accounts with Excel
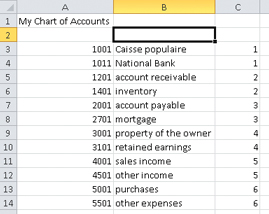
In the first cell of the first sheet of your spreadsheet, name your chart of accounts. In the following cells, indicate the account number, description and category. The categories are represented by a number:
1. Bank / 2. Assets / 3. Liabilities / 4. Capital / 5. Income / 6. Expenses
Once the chart of accounts has been created, save the file using the Save as option and by selecting the CSV file type.
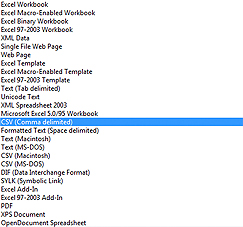
If one of the following warning messages is displayed, don’t worry: it’s perfectly normal. Simply click OK and/or Yes.


You can now import your chart of accounts and continue to set up your new company!
After clicking Next in the Company: Select Chart of Accounts window, the Edit Chart of Accounts window is displayed. In this window, you can modify the number, description and category of the selected account.
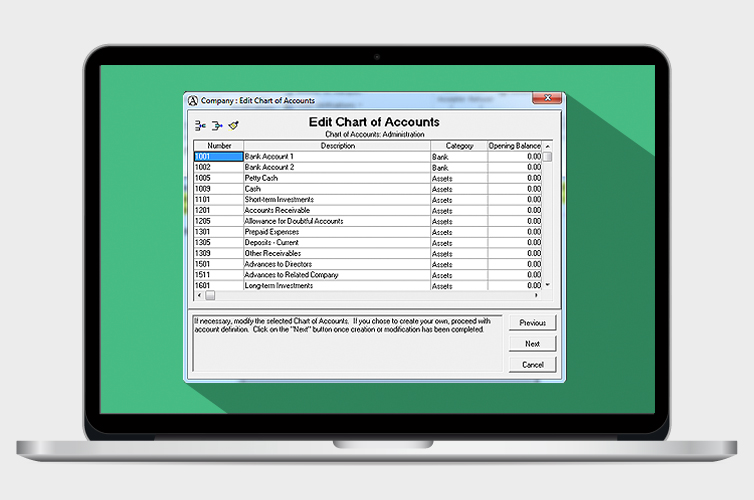
You can also insert or delete the selected account by clicking the two icons at the top left.

WARNING
The third icon ( broom) deletes the entire chart of accounts!
If you have no modifications to make, click Next and accept the confirmation requests that follow.
It’s done: your second company is created! You can select it from the Open/New Company window. This window is displayed when you click File, then Open Company.
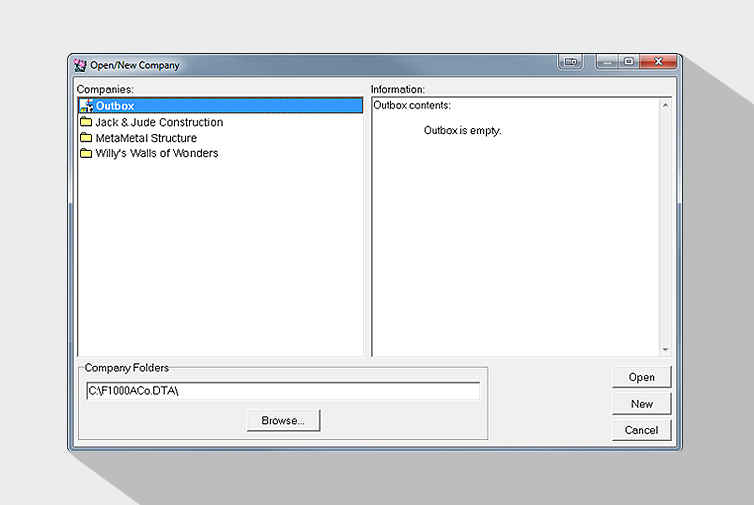
As soon as you have two companies to manage, Acomba always opens with the last company that you used, unless you have the Customization and Security module and you control user access to the various companies.
You now manage more than one company in your Acomba software!

The Acomba blog is brimming with articles on business, IT and business management.
Subscribe so you don’t miss a thing!

I am already subscribed