 Acomba GO
 Acomba
 Acomba Construction
 Enter transactions (cheque, deposit, accounting entry)
Three types of transaction can be entered with the General Ledger module:
- Cheque: Any disbursement from a bank account. The cheque can be printed immediately or deferred.
- Deposit: Any amount deposited in a bank account.
- Accounting Entry: Any operation that consists in updating the financial reports for the current fiscal year.
Note: When the General Ledger module is launched, an opening entry can be made.
![]()
To enter a cheque, deposit or accounting entry, proceed as follows:
- In the General Ledger tab, Transactions group, click Cheque, Deposit or Accounting Entry to display the corresponding window.
If this is the first entry of a cheque or deposit, the Selecting a Bank window is displayed in order to select the appropriate bank account. The account is displayed on the first line of the table. - On the first line of the table, the Account column displays the default account number used for the first entry of a cheque or deposit. Modify if required. For an accounting entry, enter the appropriate account.
- On the second line, enter the Account to debit or credit based on the type of transaction.
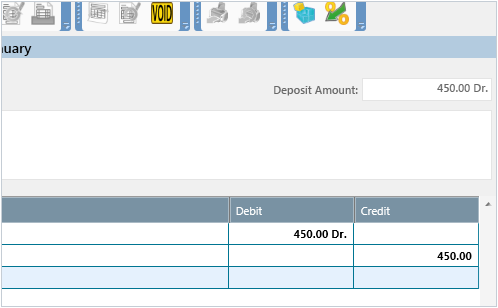
- Enter the transaction amount in the appropriate column:
- For a cheque, enter the amount in the Debit column. The amount is automatically entered in the Credit column and in the Cheque Amount field.
- For a deposit, enter the amount in the Credit column. The amount is automatically entered in the Debit column and in the Deposit Amount field.
- For an accounting entry, enter the amount in the Debit and Credit columns. The Balance field must display 0.
- To display the taxes on the transaction, click
 and select a tax group in the list. The amount of extracted taxes is displayed in the table.
 - To print the cheque, click
 .
. - Click
 to save the transaction. The deposit, cheque or accounting entry is added to the list of transactions.
Help topics
in the software
You can access Acomba X help topics using the  symbol in the upper right corner of the software’s windows.